How to Render High-Quality 3D Minecraft Models: Tired of your Minecraft creations looking like they were built by a toddler with a box of Legos? Want your builds to stand out from the crowd and leave your friends in awe?
Then you’ve come to the right place. This guide will take you from Minecraft noob to 3D modeling pro, equipping you with the skills to create stunning, high-quality models that will make your virtual world pop. Get ready to dive into the world of 3D modeling and unlock your inner Minecraft architect.
We’ll cover everything from the fundamentals of 3D modeling to advanced rendering techniques, including texture creation, optimization, and even the use of shaders and custom lighting effects. We’ll also explore real-world examples of incredible Minecraft models and provide you with the resources you need to take your skills to the next level.
So, grab your pickaxe, put on your creative hat, and let’s get started!
Understanding 3D Modeling Basics
Crafting high-quality 3D Minecraft models starts with a solid understanding of 3D modeling fundamentals. It’s like building a house; you need a strong foundation before adding the fancy details. This involves learning about polygon meshes, the building blocks of 3D models, and mastering how to manipulate them.
Polygon Mesh Creation and Manipulation
Think of a polygon mesh as a collection of interconnected triangles that define the shape of your model. These triangles, or polygons, are the basic units of 3D geometry. You can manipulate these polygons by moving, scaling, rotating, and extruding them to create complex shapes.
Imagine molding clay to create a sculpture – you’re essentially manipulating polygons to shape your 3D model.
3D Modeling Software
- Blender:A free and open-source powerhouse, perfect for beginners and pros alike. Its intuitive interface and vast community support make it a popular choice for Minecraft modelers.
- Maya:A professional-grade software with advanced features, known for its robust animation tools. While it comes with a hefty price tag, its industry-standard features are attractive for ambitious creators.
- 3ds Max:Another industry giant, 3ds Max is favored for its powerful modeling, animation, and rendering capabilities. Like Maya, it’s a paid software, but its professional-level tools can be a game-changer for complex projects.
- Blockbench:Specifically designed for Minecraft model creation, Blockbench offers a user-friendly interface and features tailored to the game’s blocky aesthetic. It’s a great option for those new to 3D modeling and want a streamlined experience.
Importing Minecraft Models
- Export from Minecraft:Start by exporting your Minecraft model in a suitable format like .obj or .fbx. You can use tools like MCEdit or WorldEdit to extract the model from your world.
- Open in 3D Software:Import the exported file into your chosen 3D modeling software. Most software supports common file formats, allowing you to seamlessly integrate your Minecraft models.
- Inspect and Adjust:Once imported, take a moment to inspect the model. You may need to adjust its scale, position, or orientation to match your desired dimensions within the Minecraft environment.
High-Quality Texture Creation: How To Render High-Quality 3D Minecraft Models
Imagine your 3D Minecraft model as a blank canvas. Textures are like the paint that brings it to life. They add detail, color, and personality to your creation. Creating high-resolution textures is crucial for achieving a polished and visually appealing look.
Texture Mapping Techniques, How to Render High-Quality 3D Minecraft Models
Texture mapping is the process of applying textures to your 3D model’s surface. Think of it like wrapping a piece of paper around a gift – the paper is the texture, and the gift is your 3D model. There are various techniques for mapping textures, each with its strengths and weaknesses.
- UV Mapping:A common technique that involves unwrapping your model’s surface into a 2D plane. This allows you to easily paint and edit the texture in an image editor.
- Procedural Textures:These textures are generated mathematically, offering endless possibilities for creating complex and organic patterns.
- Vertex Painting:This technique involves directly painting colors onto the vertices of your model, allowing for subtle and detailed variations in texture.
Image Editing Software
To create and edit textures, you’ll need a powerful image editing software.
- Adobe Photoshop:The industry standard for image editing, Photoshop offers a comprehensive suite of tools for creating, manipulating, and optimizing textures.
- GIMP:A free and open-source alternative to Photoshop, GIMP provides a wide range of features for image editing, making it a great option for budget-conscious creators.
- Paint.NET:A user-friendly image editor with a simple interface, Paint.NET is perfect for beginners who want to get started quickly with texture creation.
Seamless Textures
Seamless textures are essential for creating realistic and visually appealing Minecraft models. These textures seamlessly repeat without noticeable seams or artifacts, creating a smooth and consistent look.
- Tileable Textures:Create textures that can be tiled seamlessly across your model’s surface. This ensures that the texture repeats smoothly without any jarring transitions.
- UV Layout:Carefully plan the layout of your UV map to avoid stretching or distortion of the texture. This ensures that the texture appears correctly on your model.
- Use of Patterns:Employ repeating patterns and textures to create seamless transitions. This helps create a visually cohesive and pleasing look for your models.
Optimizing for Minecraft
While high-quality textures and detailed models are appealing, they can also impact Minecraft’s performance. Optimizing your models is essential for ensuring smooth gameplay and a lag-free experience. It’s like packing a suitcase for a trip – you need to prioritize what’s essential and leave behind anything that adds unnecessary weight.
Polygon Count Reduction
Polygon count refers to the number of triangles that make up your 3D model. Reducing this count can significantly improve performance, especially in demanding environments.
- Simplify Geometry:Combine unnecessary polygons, remove sharp corners, and smooth out edges to reduce the overall polygon count.
- Use Low-Poly Modeling Techniques:Embrace low-poly modeling techniques to create visually appealing models with fewer polygons.
- Level of Detail (LOD):Implement LOD systems that automatically switch to simplified models at a distance, reducing the strain on your computer.
Texture Compression
Large textures can be a major performance drain. Compressing them can significantly reduce file size without compromising visual quality.
- Use Appropriate Formats:Choose file formats like PNG or JPG, which offer good compression ratios without sacrificing detail.
- Reduce Texture Resolution:Lower the resolution of textures for less detailed areas of your model, such as the back or underside.
- Mipmapping:Implement mipmapping, a technique that generates multiple versions of your texture at different resolutions, allowing Minecraft to choose the most appropriate one based on distance.
File Formats
The file format you choose can significantly impact performance and rendering quality. Some formats are optimized for speed, while others prioritize visual fidelity.
- .obj:A simple and widely supported format, often used for exporting models from 3D software.
- .fbx:A versatile format that supports animations, textures, and materials, making it suitable for complex models.
- .blend:Blender’s native format, which stores all model data, including textures and animations, in a single file.
Tools and Techniques
- Decimation:A process of reducing the polygon count by merging or removing vertices.
- Retopology:Creating a new, simplified mesh that preserves the overall shape and details of the original model.
- Baking Textures:Combining multiple textures into a single, optimized texture, reducing the number of textures your game needs to load.
Advanced Rendering Techniques
Beyond the basics, you can take your Minecraft models to the next level with advanced rendering techniques. These techniques can add depth, realism, and a touch of magic to your creations.
Shaders and Custom Lighting Effects
Shaders are programs that modify the way your Minecraft world is rendered, adding realistic lighting effects, shadows, and atmospheric details.
- Realistic Lighting:Shaders can create more realistic lighting effects, simulating the way light interacts with objects in the real world.
- Shadows:Add depth and realism to your models by incorporating shadows cast by light sources.
- Atmospheric Effects:Enhance the ambiance of your models with atmospheric effects like fog, rain, and snow.
Animations and Particle Effects
Bringing your models to life with animations and particle effects adds a dynamic and engaging element to your creations.
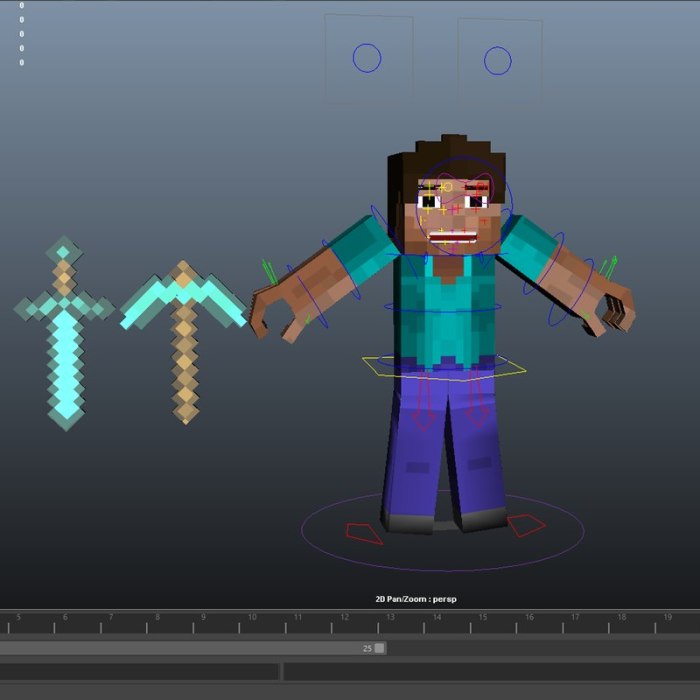
- Rigging and Animation:Rig your models to allow for movement and pose changes, bringing them to life with animations.
- Particle Systems:Create realistic effects like fire, smoke, water, and explosions using particle systems.
- Dynamic Elements:Incorporate dynamic elements that interact with the environment, such as moving parts or animated textures.
Rendering Methods
| Rendering Method | Advantages | Disadvantages |
|---|---|---|
| Ray Tracing | Highly realistic lighting and shadows, accurate reflections | High computational cost, can impact performance |
| Path Tracing | Even more realistic lighting and shadows, handles complex light interactions | Extremely computationally expensive, suitable for high-end systems |
| Voxel Rendering | Optimized for Minecraft’s blocky nature, can achieve unique visual styles | May not be as realistic as other methods, limited in terms of advanced effects |
Case Studies and Examples

To inspire your journey, let’s explore some remarkable examples of high-quality 3D Minecraft models. These creations showcase the power of 3D modeling and its ability to transform the Minecraft experience.
Design, Texture Work, and Optimization
- The Ender Dragon:This iconic creature from Minecraft has been recreated with incredible detail, showcasing advanced texture mapping and intricate animation. Its sleek design and realistic textures capture the dragon’s power and majesty.
- The Wither:Another formidable boss, the Wither is often depicted with intricate skeletal structures and menacing textures. The use of shaders enhances its visual impact, creating an atmosphere of fear and awe.
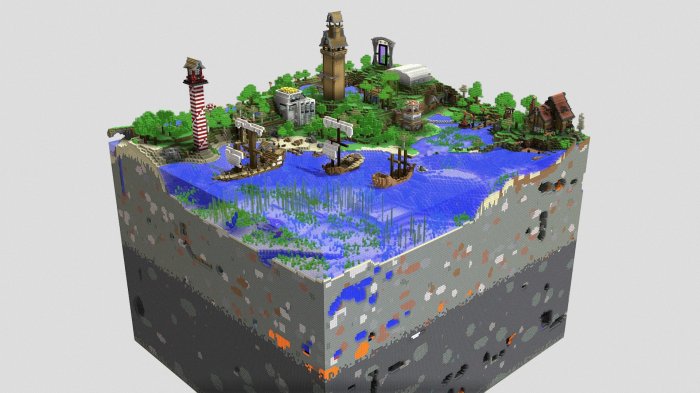
- Custom Structures:Creative builders have crafted stunning structures like castles, cities, and sprawling landscapes. These models often incorporate a wide range of textures, intricate details, and optimized geometry to create visually captivating experiences.
Custom Minecraft Worlds and Assets

Beyond individual models, 3D modeling plays a vital role in creating custom Minecraft worlds and assets.
- World Building:Modelers can create entire worlds with unique terrains, structures, and environments, expanding the possibilities of the game.
- Asset Creation:Design custom items, weapons, blocks, and other assets to enhance gameplay and personalize the Minecraft experience.
- Modding:3D modeling is essential for creating mods that introduce new content, mechanics, and visual styles to the game.
Resources and Tutorials
The world of 3D Minecraft modeling is vast and exciting. To further your journey, here are some resources and tutorials to explore.
- Minecraft Forums:A great place to connect with other modelers, share your creations, and learn from experienced artists.
- YouTube Channels:Numerous YouTube channels offer tutorials and guides on 3D Minecraft modeling, covering various techniques and software.
- Online Communities:Join online communities dedicated to Minecraft modeling, where you can find inspiration, share your work, and participate in challenges.
Final Summary

With the right tools, techniques, and a little bit of creativity, you can create high-quality 3D Minecraft models that will make your world come alive. So, don’t be afraid to experiment, push the boundaries, and have fun with it.
Who knows, maybe your next masterpiece will become the envy of the Minecraft community. Remember, the possibilities are endless, so get out there and start building!
Helpful Answers
What software is best for creating Minecraft models?
There are many great options available, but some popular choices include Blender, Maya, and 3ds Max. The best software for you will depend on your experience level and specific needs.
How do I get started with 3D modeling?
Start by learning the basics of polygon mesh creation and manipulation. There are tons of free tutorials available online that can help you get started. Once you have a grasp of the fundamentals, you can start experimenting with different software and techniques.
What are some common mistakes to avoid when creating Minecraft models?
One common mistake is using too many polygons, which can lead to performance issues. Another is using low-resolution textures, which can make your models look blurry or pixelated. Finally, make sure to optimize your models for Minecraft’s specific rendering engine.